Thursday, December 23, 2010

Tis the season to be crafty....

Fa la la la la la la la la!!!

Christmas time= Crafty time! I just love it!

Well the Christmas time craft theory has been, "Surely people will clean out their homes so Goodwill should have some good stuff!" So, my mom and I were on our way to make a Goodwill run. Shopping around the Christmas tree, we saw this ottoman...


It needed some love and for $6.99...I was going to give it all of the love it needed! SOOOOO, with ottoman in tow, we headed to Hobby Lobby (love this place!) and found the perfect fabric! Now this fabric had to match my fabulous red chair so it had to be perfect...so it was PERFECT! Off to deck the ottoman with bows of fabric...

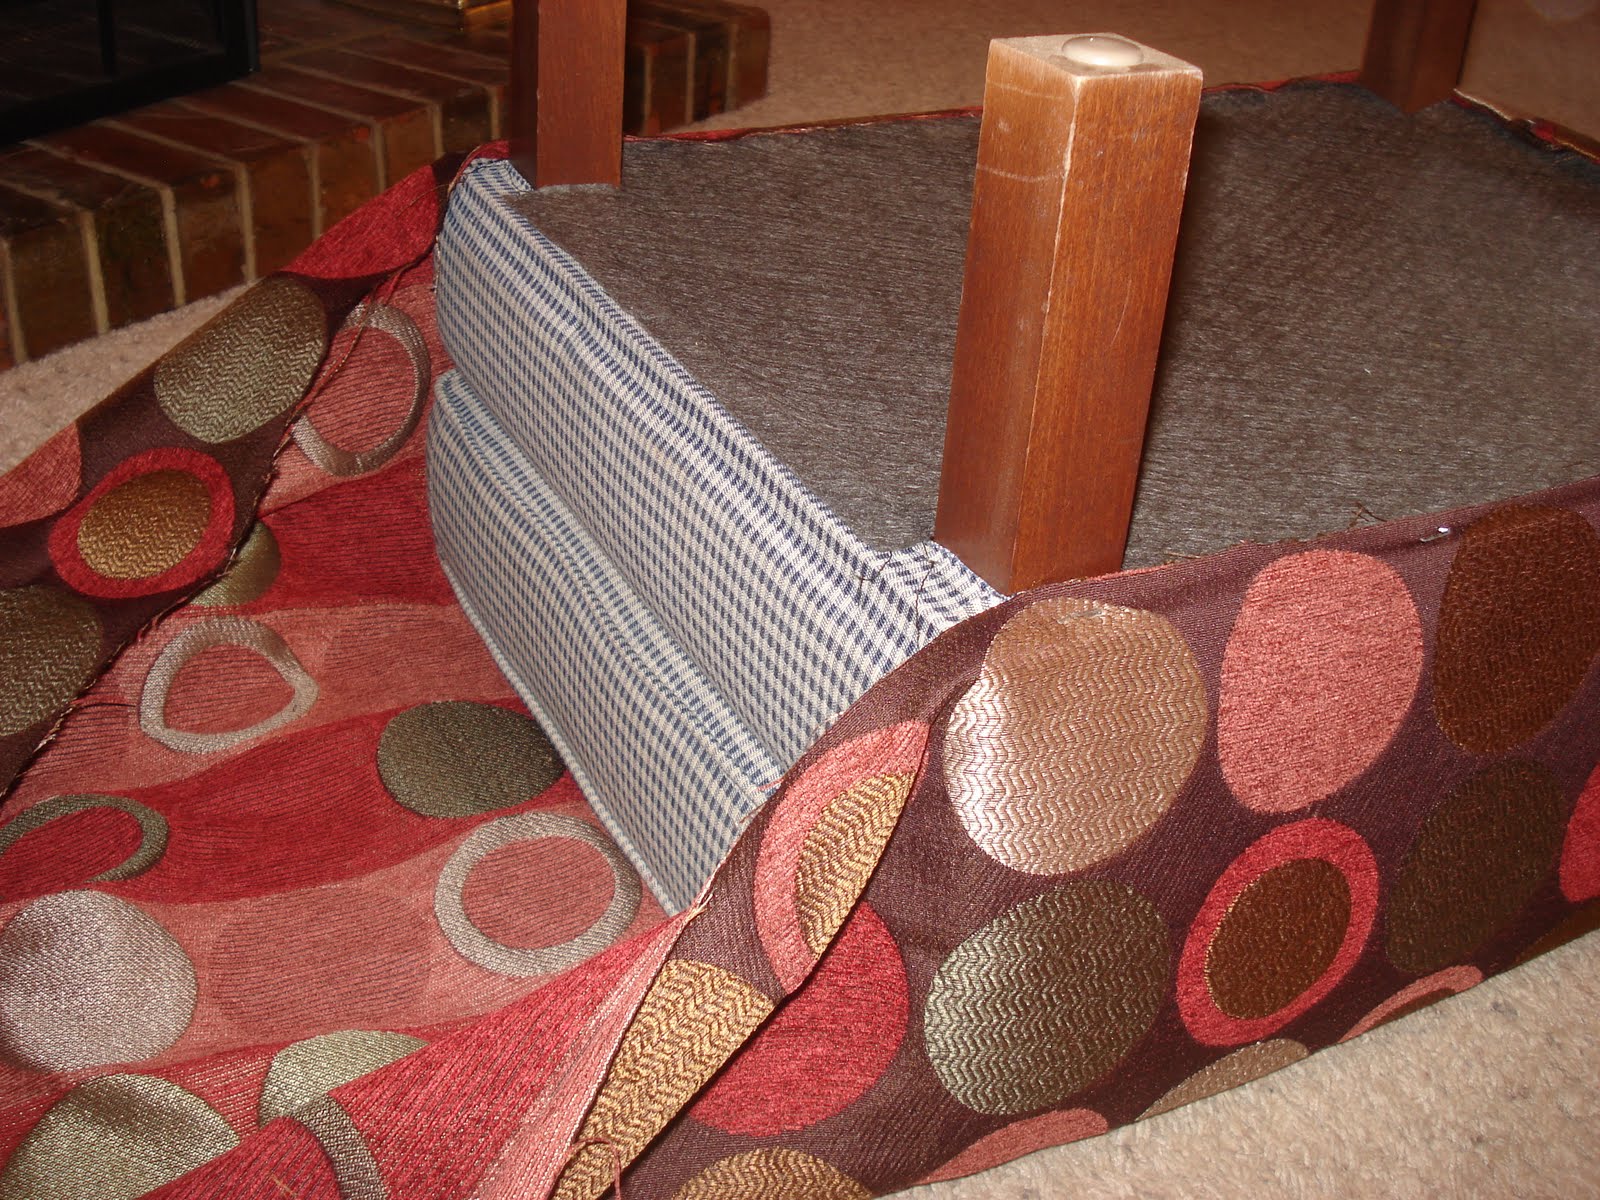
We started by taking off that tacky ottoman skirt...


Once the skirt was removed, we started folding and stapling...fa la la la la la la la la!


The finished ottoman...


This was so fun and fantastic! No sewing-- just folding and stapling!


So how does it look?


Lula Belle gives it her paw of approval!


Keep calm and creatively yours!
Nicole

Saturday, October 23, 2010

Initials are like tea in the south....

Like tea in the south? Pretty Sweet!

I love the South. Everything about it makes me absolutely fall in love with it over and over again! I love the warmth of sun, the closeness of the beach, the oak trees, the smell of spring, the sounds of fall. I love being southern more than anything else in the world. I love our accent and the way we completely mush together words....like when we say "fixin' to" or "ya hear." I love wearing pearls with every outfit and drinking sweet iced tea. My most favorite things of all...the word "yall" and MONOGRAMS! I love seeing the letters of my name plastered on all of my bags, bed spread, towels, and more! (Even my dog has monogrammed pjs!) I don't feel like it's vain, but I feel like it is oh-so-charming! Everyone should have something with their letters on it!

Monogram + easy affordable craft = a very happy Southern Belle!

I made these sweet letters for a friends 4 year old girl. I bought the wooden letters at Hobby Lobby for $1.99 a piece.


I gathered a piece of scrapbook paper for each letter, Mod Podge, and an exacto knife!


I traced each letter on the scrapbook paper and carefully cut it out. Next, I applied a layer of Mod Podge, dipped the scrapbook paper in water, placed the paper on the letter, and applied a final coat of Mod Podge. After the letters were dry, I trimmed any edges with an exacto knife. Using hot glue, I applied the ribbon for easy hanging.

Tadaaaa! The final product:


The possibilities are truly endless! It's sweet, it's southern, and it's personal!

Yall Come Back, Ya'Hear!
Nicole

Tuesday, October 19, 2010

Pottery Barn taste....Goodwill Budget....

Inspiration to me comes in the form of a seasonal magazine with the big letters
"P O T T E R Y B A R N" at the top. I squeal every time! I literally take the magazine, grab a blanket, a cold diet coke, and sit on the couch and savor every page. It's always so delicious!

Saturday, my mom and I made our Goodwill run after a delish breakfast at IHOP. (it was seriously the best Saturday morning ever!) We came across a table that had simple charm and great height. The visions started forming and we HAD to have it! After the $9.99 was spent on the table (we picked up a few picture frames as well!) we were on our way home with a couple of great finds! We grabbed our new issue of Pottery Barn and on page 50 we saw IT! This table had the bones of becoming the perfect table on an empty wall at my mom's house. The picture frames will be a perfect side dish! This project was especially fun because I had an assistant(my mom)!

Our inspiration:


Our materials:

and...


We began by painting 2 coats of chocolate froth(yum) on our table!

(That's my assistant and her 2 dogs! Notice everyone is sitting down...hmmm)

We removed those hideous pictures and painted the frames. One of the frames was so unique, I decided to just sand it down. It's amazing what a little sandpaper can do.


We distressed the table and I must say it turned out fabulous!


This project is a work in progress. There are more frames to paint, more accessories to find, and more Pottery Barn pages to look through! Keep checking back for the final project!

Wishing you all Pottery Barn wishes and creative dreams!
Nicole

Tuesday, October 12, 2010

Keep Calm and Paint

So, I finished the other painting for my bestie's nursery. I must say they are adorable!


Aren't those the cutest!!!! Those sweet pictures made me want to post other pictures I have painted. All originally painted by me but they were painted at Paint Party Studios (the greatest place in Mobile!)
Here are a few!
The lovely ballerina...I also did a blonde ballerina for my friend's sweet baby girl!


And a Nicole original...Tres Poppies!

Fabulous!
Creatively yours,
Nicole

Sunday, October 3, 2010

Crafty Sunday...Maybe it's the weather!

Maybe it's the weather, but all I wanted to do today is projects!!! I began my morning with a fabulous monkey painting for my bestie's nursery!


Too cute right?!! (It's not an original but I couldn't let her pay $100 for that same picture in a store!)

After a full day of shopping and cleaning, I pulled out my projects basket and dug out a few picture frames.
The first 2 frames I used my scrapbook/ mod paudge method. They turned out adorable!

WHO DAT!!!!


GO JAGS!

The third picture frame was my original inspiration for my craft journey. I saw a picture frame at Objects and I fell in love! However, I looked at the price tag and it said $39.95. I thought that it looked easy enough for anyone to do! Well, I made my frame for all of $4.00. Crazy right?! I began by painting 2 coats of Chocolate Froth (my fav color!).

While my paint was drying, I pulled out my pink ribbon and made a cute little bow! I took pearls (beads that look like pearls) and put them on string. Then, I took the string of pearls and wrapped it around the bow a few times. (Don't forget to hot glue it in place!)

After my paint dried, I pulled out my square of sandpaper and went to town! I lightly distressed the wood, glued on my bow, and VIOLA! My fabulous $39.95 picture frame (for $4.00) FANTASTIC!

It looks adorable with a picture of my best girls in it!

Creatively Yours!
Nicole

Sunday, September 12, 2010

My list of excuses as of why I have not blogged:
1. school
2. grad school
3. Did I mention school?

It has slightly knocked the wind out of my sail but I am slowly getting into a routine! Yay for routines! Well I had a little time this weekend and I have a craft basket yelling my name! So I dug out a simple but super cute and quick project!

A while back, my mom and I obsessed over a trip to the local Goodwills (I say Goodwills because we visited all 3 in one day!)Anyways, I think that we spent $40 between the 2 of us, but we definitely struck pay dirt! One of our finds was a wooden candle holder for $.79. We thought it had potential so we scooped it up. Later on that day I found a fabulous pillar candle for $1.99 at a clothing store. I loved it because the wick had a pearl on it--my favorite!

So my vision of this candle holder was for it to be placed in my mom's new fabulous shabby chic-ed bedroom!

So I gathered my materials (that's the teacher talk in me!) which consisted of Chocolate Froth colored paint and some sandpaper.


Next, I painted 2 coats of delish chocolate froth on the candle holder.


After the paint dried, I grabbed a small square of sandpaper and distressed! I think it turned our simply fantastic!

My mom should be proud!

Tuesday, August 24, 2010

It's been a while...

Okay so i have been super busy!!! School has started so many of my craft projects are now being worked on by 14 smiling kindergarteners! However, I have been frequenting the Goodwill! (I love this place!) I have plenty of projects BEGGING me to begin and hopefully I will have some time soon!

Future projects to look out for:
- Cupcake stands (I bought a ton of supplies from Goodwill!)
- Candle holder
- Another candle holder thing (my mom donated this!)
- 4 picture frames
- 2 wooden chairs

I am also looking forward to purchasing a monogramming machine! I think I have found one, but I have to have a craft table. So, I am also looking for a craft table to put it on, which is not as easy to find. If you have any ideas, PLEASE share share share!

Tuesday, August 3, 2010

Back to School....a day of lasts...

Today has been a long day of lasts. I had my last breakfast, lunch, and dinner of my summer 2010. It was a super fun one and I'm sad to see it go! But, I must carry on. It's time for a new adventure! Thursday I will find out who will be my precious new kindergarteners! After much work on my classroom (I'll post pics later!), and I mean A LOT of classroom work, I think I am about 98% finished!

So as I am looking online for some cute new teaching ideas and I came across a craft project to make a lap desk. It sounded easy enough! I gathered a few materials (dry erase board, fabric, hot glue gun, and plastic bags) and headed over to Lizzie's house. Here is what we came up with!

First, I glued 3 sides of fabric around my dry erase board.


Then I stuffed it with plastic bags, what a great way to REUSE!


I glued the fourth side and added ribbon and a bow!


My students are going to love these! The possibilities are endless!!!!!!

Monday, August 2, 2010

A picture (frame) is worth so many words!

Inspiration is everywhere! I saw a cute picture frame online and I thought to myself "I can do that!" With a little help from the internet and a couple of DIY websites, I have made the cutest picture frame! I gathered a few materials...unfinished frame, Mod-Podge, cute paper, and a hot pink flower.

First, I traced my picture frame on the cute paper. I cut around the picture frame with an Exacto knife (I love those things!).


Set the paper to the side. Next I painted the sides and the inner area of the frame white so that the wood is not seen. Then I put a layer of Mod-Podge on the picture frame. I gently soaked the paper in water and applied it to the frame. While the paper is still wet, apply another coat of Mod-Podge. Once it has dried, apply another coat- for good measure!


After the Mod-Podge has dried, I trimmed the edges and added a super cute pink flower! The final project:


Tell me what ya think! I would love some insight!

I plan on making more picture frames in college game day colors and designs! Let me know if you would like to order one and the college and it will be ready within the week! Cost is $10.(Auburn fans will have to pay more! ROLL TIDE!)

Keeping calm and creatively yours!

Wednesday, July 28, 2010

Keep Calm and Create...A day of firsts!


I recently came across the saying "Keep Calm and Carry on." After much inspiration, I have decided to adopt this as my life motto. As a kindergarten teacher, keeping calm and carrying on is a regular part of everyday life. I want to use this motto as every part of my life in as many ways as possible, starting with my blog! Fabulous!

Now off to my great day of firsts! I painted my first "free hand" picture today. I have painted many pictures before, thanks to the fabulous Renee of Paint Party Studios, but never one completely on my own. Recently, a friend asked me to paint her a picture of a blonde haired ballerina. I said I would, I cannot say no to anything, and it turned out fabulous! So with that confidence in tact, I decided to do a painting for my guest bedroom. I love poppies! What a fun and fabulous flower! So I painted 3 white poppies on a blue background. Not bad for a first painting.


Why stop there with firsts! As I was going on my daily walk with my mom, we found a chair on the side of the road (my first "dumpster dive"). It is an old wooden chair that will be a fun project! As for now, my plan is to paint, distress, and decorate this chair that would have been sent to the dumpster. I hope it turns out fabulous!

Keeping calm and creatively yours!

Tuesday, July 27, 2010

My First Post!

I've made it! I've always been a creative person, I can remember making newspapers and books at a very young age. However, I do not have as much time on my hands like I used to (sad face!). I plan on changing that. With this blog, I hope to get back to the creative me that I feel like I am slowly losing! It all starts with a simple plan. My plan? I have no idea. What I would like to do is find something super cute, like those fabulous picture frames at Objects in Malbis, and recreate them for much cheaper and more fabulous! So here it goes!